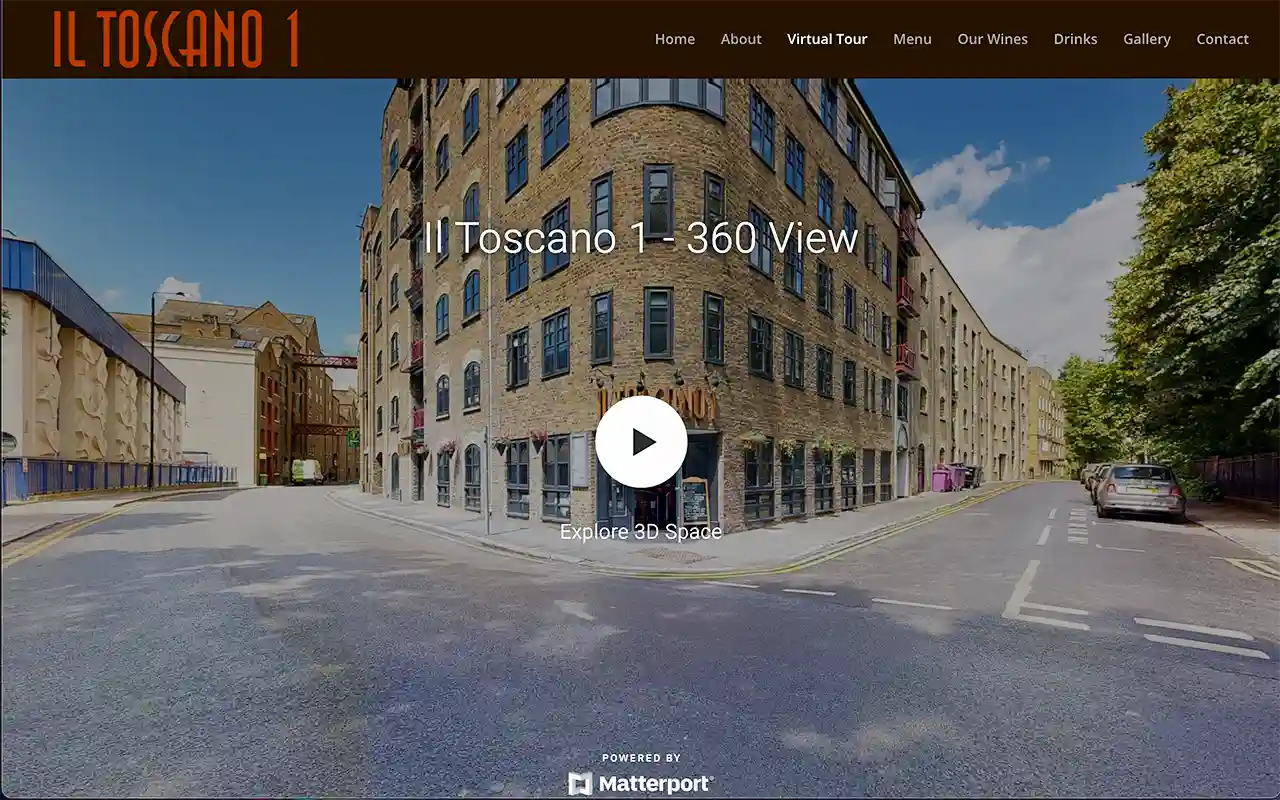
Embedding a Matterport 3D Model in WordPress: A Step by Step Guide
Bringing Your Space to Life with Matterport 3D Models on WordPress In today’s digital age, immersive content is the key to capturing attention and providing memorable experiences online. If you’re looking to elevate your WordPress website with interactive, real life simulations, embedding a Matterport 3D Model in WordPress is a stellar way to achieve this. This guide is crafted to help you seamlessly integrate your Matterport virtual tours into your site.
Planning a Matterport tour for your UK business? See Matterport Digital Twins and how UK teams capture a space once, then share the walkthrough with clients for years.
Whether you’re showcasing real estate, virtual exhibits, or any space imaginable, follow these simple steps to engage your visitors with a captivating three dimensional walkthrough. The Embedding a Matterport 3D Model in WordPress by 360 View. See Matterport.
Step 1: Access Your Matterport Model

Locating Your 3D Model on Matterport
Before you can wow your website visitors with an interactive tour, you need to retrieve the embed code for your Matterport 3D model.
Here’s how you can locate it:
- Sign In to Matterport: Begin by logging into your Matterport account. Your dashboard is the gateway to all your 3D models.
- Select Your Model: Browse through your list of completed models and choose the one you wish to embed on your WordPress site.
- Share and Embed: Once you’ve selected the model, look for the ‘Share’ button, typically represented by a universal sharing icon. Clicking on this will reveal various options to share your model.
- Obtain the Iframe Code: Within the sharing options, find and click on the ‘Embed’ tab. Here, Matterport provides you with an HTML snippet, also known as an iframe code. This code is the bridge between your 3D model and its destination on your website.
Step 2: Copy the Embed Code

Securing Your Unique Embed Code for WordPress Integration
With the iframe code in sight, you’re just a few clicks away from embedding your model:
- Copy the Code: Click on the iframe embed code provided by Matterport to highlight it, then copy it to your clipboard. This unique code is tailored specifically to your selected 3D model, ensuring it displays correctly on your site.
- Ensure Code Completeness: Double check to make sure the entire code snippet is selected. Iframe codes often contain specific dimensions and settings that are crucial for proper display.
By completing these first two steps, you’ve now got the necessary piece of HTML ready for your WordPress website, setting the stage for an interactive display of your space.
Step 3: Prepare Your WordPress Page
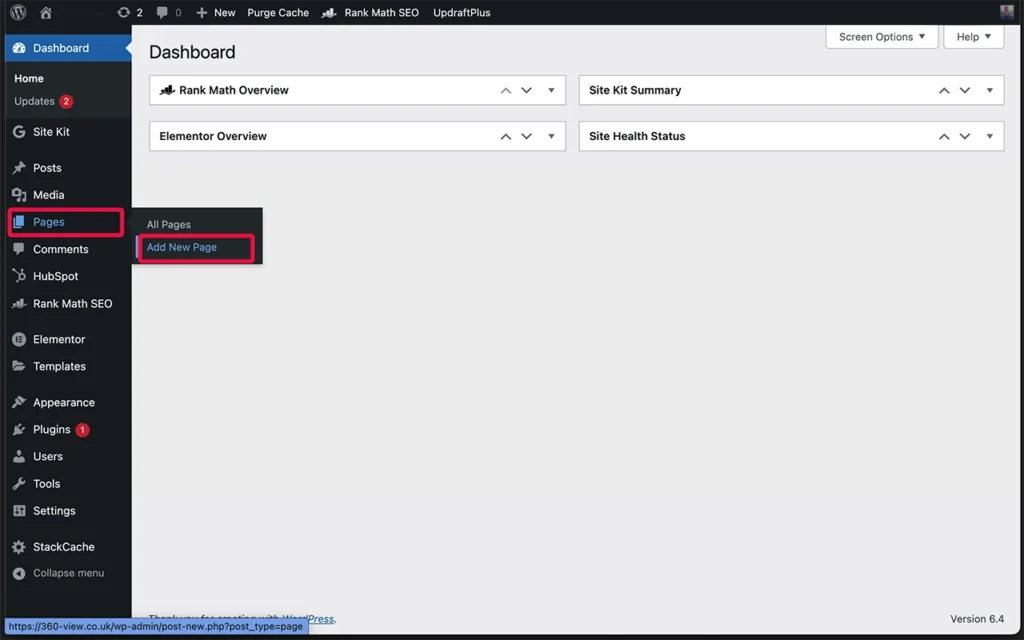
Designating the Perfect Spot for Your 3D Tour
The next phase involves deciding where on your WordPress website you want your Matterport model to make its home.
Here’s what to do:
- Access Your WordPress Dashboard: Log into your WordPress site to get to the control panel where all the magic happens.
- Navigate to Pages: Find the ‘Pages’ section in your dashboard menu. This is where all your site’s pages are managed.
- Choose Your Location:
- To add your model to a brand new page, click ‘Add New’ and give your page a title that reflects the content of your 3D tour.
- If you’re adding the model to an existing page, locate the page from the list and click ‘Edit.’
Setting up the right page is crucial for contextual integration, ensuring your visitors not only enjoy the model but also understand its relevance to the rest of your site’s content.
Step 4: Paste the Embed Code

Embedding the 3D Model in WordPress
With your page ready, it’s time to embed the Matterport model:
- Open the WordPress Editor: Whether you’re working on a new or existing page, the WordPress Editor is where you’ll paste the iframe code.
- Add a Custom HTML Block: In the editor, click the ‘+’ button to add a new block and search for ‘Custom HTML.’ Select it to add it to your page.
- Embed Your Model:
- Click into the ‘Custom HTML’ block.
- Right click and paste the iframe embed code that you copied from Matterport.
By embedding the code into a ‘Custom HTML’ block, you ensure that your WordPress site will maintain the code’s integrity and display your model exactly as intended.
Need a Matterport tour before you embed? Our UK team captures your space, delivers the digital twin, and gives you the embed code ready for WordPress. Pricing in GBP.
Step 5: Customise Display Settings
Adjusting Your Model for Optimal Display
Now that your model’s code is embedded, it’s time to make sure it looks just right:
- Adjust Iframe Dimensions: Within the ‘Custom HTML’ block where you pasted the iframe code, you’ll see width and height parameters. Adjust these numbers to suit the layout and design of your page. A common setting for a full width display on most themes is
width="100%"andheight="600". - Maintain Aspect Ratio: It’s important to maintain the aspect ratio of the iframe to prevent distortion of your 3D model. A standard aspect ratio for responsive design is 16:9.
- Preview the Changes: After adjusting the dimensions, click the ‘Preview’ button to see how your Matterport model will look. Make further adjustments if necessary to ensure the model fits neatly within the page’s design.
Adjusting the display settings is a critical step to ensure that your Matterport model is not only functional but also visually harmonious with your site’s existing aesthetic.
These steps help ensure that your 3D model isn’t just a standalone piece of content, but a fully integrated part of your website’s user experience.
In the next steps, you’ll learn how to preview your page, publish it, and conduct a final review to make sure your audience can enjoy a smooth, interactive experience with your Matterport model.
Step 6: Preview Your Work
Ensuring a Flawless Integration Before Going Live
It’s crucial to review your work before it becomes visible to your audience.
Here’s how to preview your embedded Matterport 3D model:
- Use the Preview Feature: Within the WordPress editor, you’ll find the ‘Preview’ button. Click it to open a new tab that shows how the page will look once it’s published.
- Examine the Layout: Check to ensure the embedded model is aligned correctly, the dimensions fit well within the page, and that there are no unexpected scroll bars or cutoffs.
- Test Functionality: Interact with the model in preview mode to confirm that all the features of the Matterport model are working as they should.
Taking the time to preview your page ensures that you catch any issues that might detract from the user’s experience, allowing you to make necessary adjustments before the page goes live.
Step 7: Go Live
Publishing Your Interactive 3D Model
With your Matterport model perfectly in place, you’re now ready to share it with the world:
- Publish or Update Your Page: Once you’re satisfied with the preview, navigate back to the WordPress editor and click either ‘Publish’ (for new pages) or ‘Update’ (for existing pages) to make your changes live.
- Confirm Publication: WordPress will often display a confirmation message with a link to view the post. Click it to see the live page.
- Announce Your New Feature: Consider announcing this new feature to your audience through your website’s news section, email newsletters, or social media channels to draw attention to your new interactive content.
By publishing your page, you invite visitors to experience a new dimension of your website, offering them a virtual tour that can help your site stand out.
Step 8: Test the User Experience
Perfecting the Visitor’s Journey Through Your Virtual Space
The final step is to ensure that the live experience meets your standards:
- Navigate the Live Model: Visit the page as if you are a user. Click through the Matterport model to ensure the navigation is smooth and the model loads correctly.
- Test on Different Devices: Check the page on various devices, including tablets and smartphones, to ensure the embedded model is responsive and provides a good experience on all screen sizes.
- Monitor Load Times: Pay attention to how quickly the model loads, as this can significantly impact user engagement. If it’s slow, you might need to adjust the size or consult with web performance tools or a developer.
Congratulations! By following these steps, you’ve successfully embedded a Matterport 3D model into your WordPress site, creating an interactive and engaging feature for your visitors.
Remember to regularly check the model’s performance and user feedback to keep the experience smooth and enjoyable.
Expanding Horizons with Matterport on WordPress
Embedding your Matterport 3D model into your WordPress site is more than just a technical achievement, it’s a doorway to an immersive user experience that can significantly enhance the perception of your brand or service.
By following the steps outlined in this guide, you’ve added a dynamic, engaging element to your site that not only captivates visitors but also invites them to explore your space with the click of a mouse.
As you continue to leverage the power of virtual reality and 3D modeling, remember that the journey doesn’t end with embedding; it begins with the stories you tell and the experiences you share through these innovative technologies.
Get In Touch with 360 View if you need help or have any questions about embedding a Matterport 3D Model in WordPress.
We are the experts in making Immersive virtual tours and you can chekc out our Recent Work here.
Ready to share your space with every client, from anywhere? Capture once with Matterport, embed in WordPress, send a link. UK pricing in GBP with one fixed quote.
Frequently Asked Questions
Are virtual tours accessible for vision-impaired users?
We support screen readers and keyboard navigation for accessibility. Audio descriptions can be added to tours to help visually impaired visitors understand spaces. Ask us about accessibility features.
Is there a price difference for outdoor vs indoor captures?
Outdoor captures are typically similar in cost to indoor. Large outdoor areas or complex sites may cost more. Discuss your specific property with 360 View for accurate pricing.
Can I brand the virtual tour with my logo?
Yes. Custom branding options include your logo, colour scheme, and company details. This ensures the tour reflects your brand identity and builds trust with viewers.
How do virtual tours compare to in-person site visits?
Virtual tours can’t fully replace in-person visits but reduce unnecessary trips. They qualify serious prospects, allowing in-person appointments to be more productive. This saves time and costs for both businesses and customers.
Do I need to arrange parking for the 360 View team?
Yes, if possible. Let us know about parking availability. We typically need 1-2 spaces near your property entrance. Confirm arrangements when scheduling.
What image resolution do 360 View tours use?
We capture at high resolution (typically 10-12K combined pixels per panorama) to ensure sharp, clear images. Details remain crisp even when viewers zoom in to explore closely.
Do 360 View tours have an API for integration?
Yes. Advanced clients can access APIs for custom integrations, white-label solutions, and system connections. Contact 360 View to discuss API access and custom development.